Showing posts with label howto. Show all posts

Thursday, July 10, 2014

How to: Eyebrows

Eyebrows shape your face, so its important not to miss this out on your makeup routine!
1) Outline
2) Fill in starting from the middle of your brows then work your way towards your nose.
3) brush with a spooley to make them look natural
4) set it with clear gel.

=)

Click on the video down below!

How to Eyebrows Video

Sunday, May 11, 2014

Urban Decay's Electric Palette

SOME CALL IT TOO MUCH MAKEUP, I CALL IT ART =)

I had so much fun playing around with the latest palette from Urban Decay! Ahh the bright colours perfect for spring and summer.
I'm really surprised that even though its Matte, doesn't appear chalky at all…Good job Urban Decay! Although i kind of wish they added a matte black eyeshadow  or at least a 24/7 eyeliner instead of the brush. I can think of doing soooo many looks out of this palette!


 I did 2 looks for now :P pretty wearable…or at least for me it is
1) Fun, bright one for day time
2) Sultry for night time


DAY look
Colours used:
Lid: Thrash
Crease: Urban, Savage and Slowburn
Outer V/half: Chaos (my fave!)


Night look
Colours used:
Upper and lower lids: Chaos
crease: a little bit of my bronzer to warm up the look and slowburn (upper crease)


Monday, February 17, 2014

5 tips to make your eyes look bigger and brighter


1) Filling in your eyebrows: It frames your face and it can make or break your look :)

2) White eyeliner or even NUDE on waterline instead of Black: Some find white eyeliner harsh and "too out there" Instead, use Nude liner. This instantly brightens and gives the illusion of bigger eyes. Use only black eyeliner on your upper lash line.

3) Highlight and contour: (You're good with 3 eyeshadows)

- Highlight using a bright/shimmery champagne eyeshadow on your inner corner of your eyes, under your eyebrows/brow bone and centre of your eyelid.

- Contour your crease and lower lash line to give your eyes a little bit of definition.

4) Curl your lashes and put on MASCARA!! If i were to only choose 1 product, i would always choose mascara. I cannot stress enough how important it is not to miss this step. I usually have 2-3 coats, rather than having just one coat. (ohh, and wiggle your wand from the bottom working your way up).

5) Do not forget to dab on concealer: Rather than using a concealer that suits your skin tone, use a Salmon-y/pinkish colour (one shade lighter than your skin) that would hide the dark cast under your eyes and cover all of those green/purple veins.


xo
Denise

Monday, January 27, 2014

Makeup for glasses

Makeup for Glasses

 My normal everyday makeup looks so blah and plain when i wear glasses compared to when I'm not. For some reason, once i put my glasses on, it seems like i don't have any makeup on. LOL 

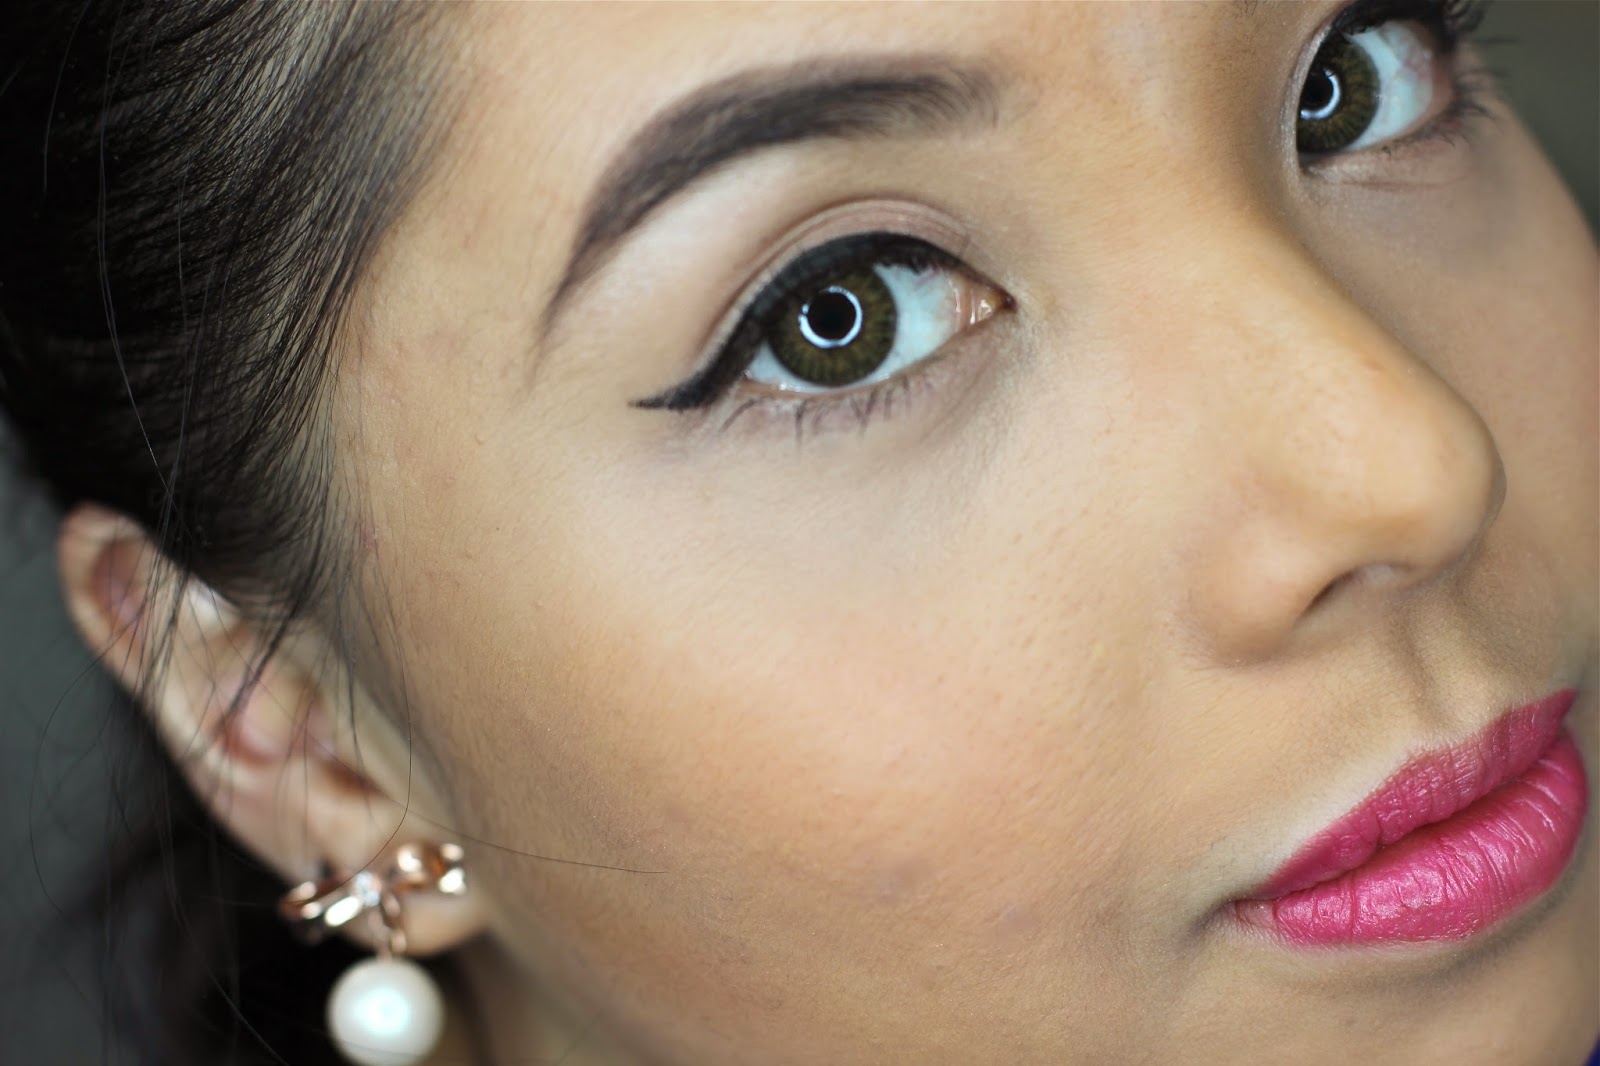
Glasses tend to put a dark cast under your eyes and they become the main focus of your face so its important to:

1) Use an opaque brightening concealer

Glasses frame your face and if you don't do your eyebrows, it may look off and weird. make sure you

2) do your brows, (thicker and more-arched than the usual) they frame your face.


3) Contour your eyes, face and do it darker than the usual. It may look a lot but when you put your glasses, it will look fine =)

4) Brightener: Use a shimmery eyeshadow on the inner corners of your eyes, brow bone, and the lids to brighten up your eyes 

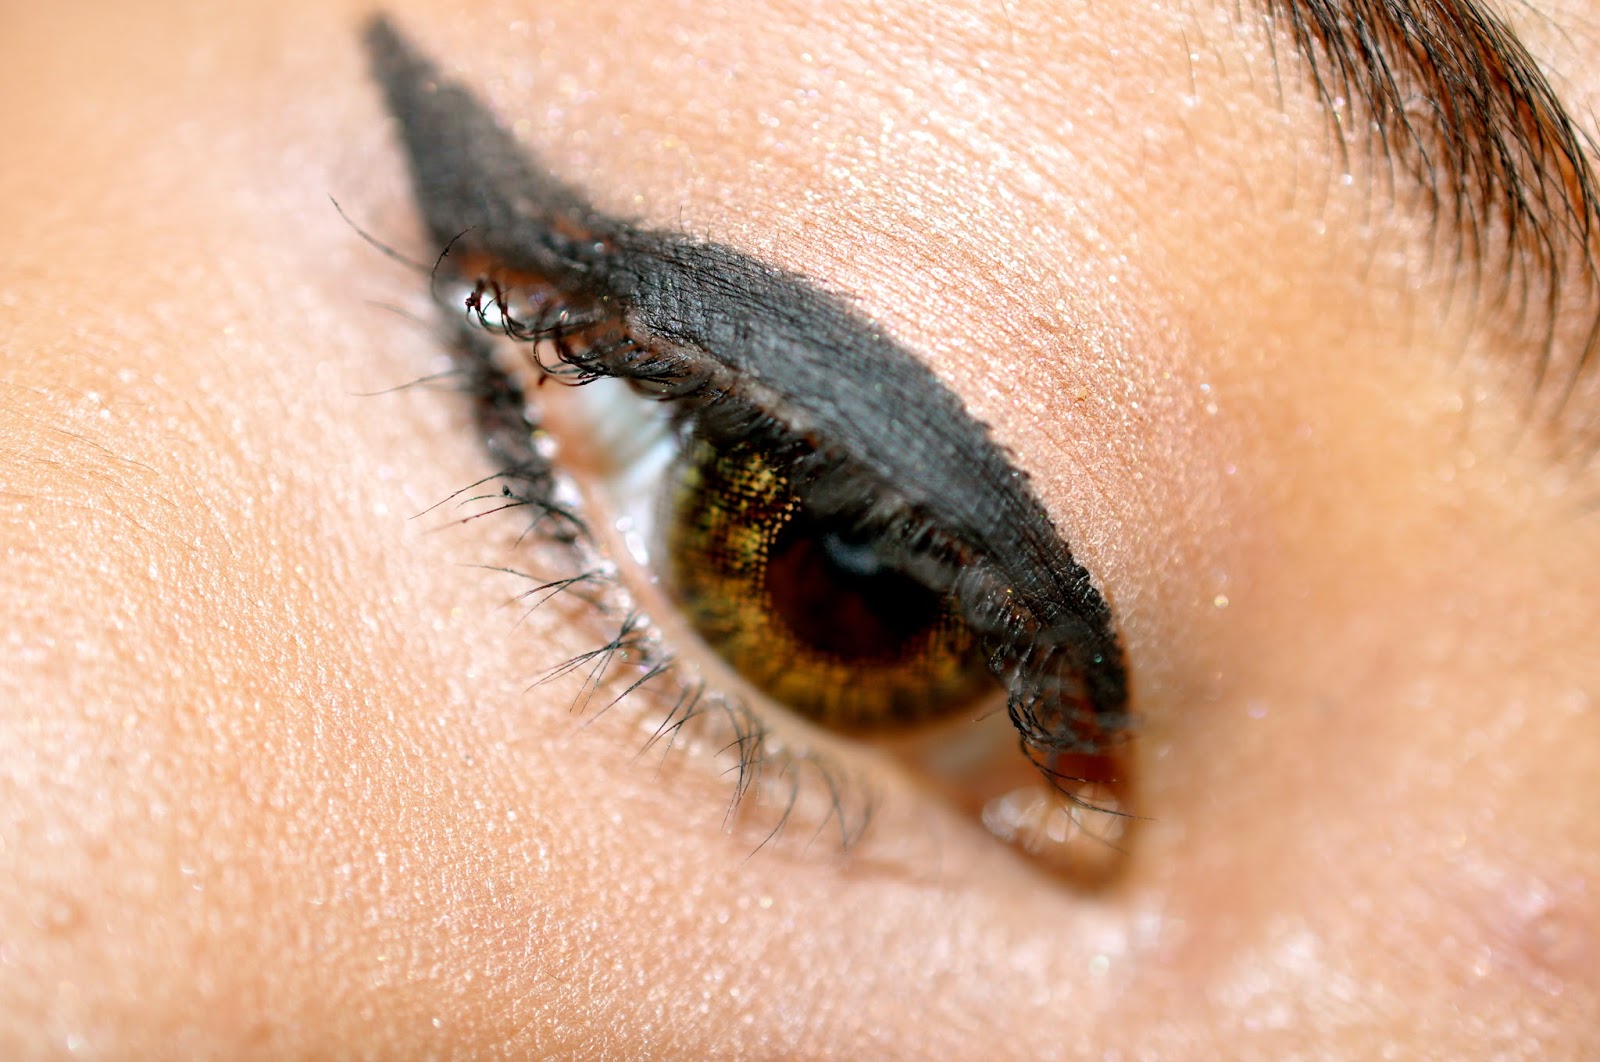
5) Bigger eyes: beige/cream liner on your waterline to make your eyes look bigger
                         thicken your eyeliner a little bit, extend and wing it out rather than following your eye   
                         shape.


:)


Thursday, September 12, 2013

Bobby pins: how to correctly use

Make sure the top one is the flat side and the curved one is facing down.The ribbing is designed to grip hair and lock in place. It ends up capturing more hair too! 

Wednesday, September 4, 2013

How to: Winged Eyeliner Look/Cat Eye

Hello superfoxies!

  When doing an cat eye /winged liner look, its easier if you practice with GEL eyeliner and an angled brush. Once youve mastered, then we'll move on to liquid liner. (i used MAC's fluid line and eco tool's angled brush)

First line your eyes just like how you normally do. As you can see here, the before and after look on each eye:P


then from the bottom, follow the natural curve and at the end, use it as your guide to angle up your brush. this will help you to have even lines for both eyes. its up to you how high you want it to be, i did mine just medium sized wings.


then connect  and fill in!!


aaaand you're all set!


also, play it up and be different! i added purple too. simply outline the black :)


xo,
Denise